| Rarity | Cost | Class |
|---|---|---|
| 3★ | 7 |  Berserker |
| Rating | 8/10 |
|---|
[ JP ]
Like most AoE Servants, Kiyohime’s role is that of a wave-clearer. As a Berserker she does this quite well, but there’s more to her than just damage, which is what makes her worth using. Her NP gain among the Berserkers stands out as one of the best, and her 2nd skill allows her to deal more damage to a single target. All in all, Kiyohime’s kit is pretty similar to Darius and Eric’s, but hers is arguably the best among the three.
[ NA ]
Kiyohime still hasn’t received her Skill upgrade at NA yet, which means her NP does far less damage than it does on JP. Her NP gain is still pretty good however, so she’s still pretty worth using.
As both a Berserker and a damage dealer, Kiyohime would rely on support to sustain her and boost her damage. Thankfully, most of the available supports ingame can both improve her damage and survivability, so it’s not a big problem. She can also be paired with a taunter like most Berserkers, but her Stalking skill’s demerit can be very crippling against a taunter.
Kiyohime’s NP gain is solid enough in that she can charge reliably through her chains, so one can also rest easy on that aspect when using her.
Kiyohime’s NP deals good damage when buffed by her own buffs. She deals roughly the same amount as Darius, ranking as the 3rd or 4th strongest AoE Berserker NP ingame. While the stun chance is mostly neglectable, it offers decent utility in that it provides a chance to give her a turn of protection from attacks.
| Servant | Explanation |
|---|---|
 Zhuge Liang | Waver’s DEF up can stack up with Kiyohime’s Morph, and has a damage cut included, which can prove to be very useful in countering the demerit in Kiyohime’s Stalking skill. His ATK up and DEF down also stack up for an incredible amount, giving Kiyohime a significant boost in damage. |
 Hans Christian Andersen | Hans is able to stack up his DEF and ATK buffs for Kiyohime’s survival and damage. He’s also able to heal her and provide Arts cards to be used as the first card in a chain, to boost Kiyohime’s NP gain. |
 Saint George | George offers a 3-turn taunt to cover for Kiyohime. George has the highest scaling DEF buffing among the available 3 turn taunters ingame, and thus would be affected the least by Kiyohime’s Stalking demerit. His performance overall is very stable, and can be very reliable in protecting her. |
 Le Chavelier d’Eon | D’eon is able to taunt for 3-turns, which lets her take damage to cover for Kiyohime. While it’s rather dangerous to deploy them together due to d’Eon’s lack of DEF buffs, she also possesses a dodge skill, which can let her tank NPs without relying on DEF stacking, thus nullifying the effect of the demerit for some time. |
 Merlin [ JP ] | Merlin is able to buff Kiyohime’s Buster and ATK, which offers her a great boost in overall damage. He can also heal her very well, allowing for a very good amount of sustain. He can also charge her NP gauge passively, which, when combined by her naturally fast gain, would let her fire off her NP at a good rate. |
Since Kiyohime already has a Buster up and a DEF down, an NP damage up CE would be best, as it multiplies with her own buffs and debuffs. She can charge her NP gauge decently as well, so if one supports her, one would be able to exploit her boost in NP damage with multiple uses.
While another Buster up would simply add up to her own buff, such a CE is also useful to boost Kiyohime’s normal damage, since it is still limited by her low ATK.
| CE | Explanation |
|---|---|
 Scorching Embrace | If equipped to Kiyohime, Increase NP damage by 30%. Chance to inflict 500 damage burn (5 turns) when attacking. |
| Lvl | HP | ATK |
|---|---|---|
| Base | 1,649 | 1,233 |
| Lv40 | 5,896 | 4,290 |
| Lv70 | 9166 | 6644 |
| Lv80 | 10248 | 7423 |
| Lv100 | 12428 | 8922 |
| NP Charge (ATK) | 2.03% |
|---|---|
| NP Charge (DEF) | 5% |
| Star Weight | 9 |
| Star Rate | 4.9% |
| Death Resist | 65% |
| Alignment | Lawful, Good |
| Attribute | Earth |
| Traits | Female, Humanoid, Dragon, Servant, Weak to Enuma Elish |
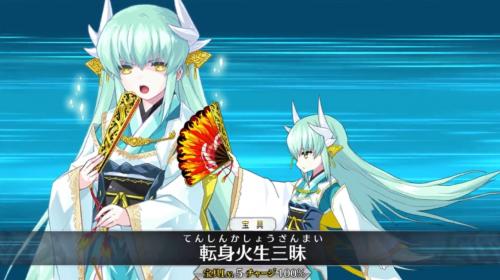
Transforming, Flame-Emitting Meditation
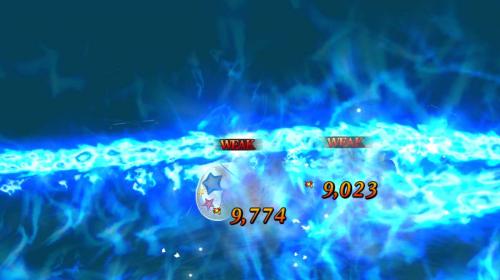
Deals damage to all enemies
[Overcharge]Chance to Stun
Apply Burn damage for 10 turns
| Rank | EX |
|---|---|
| Classification | Anti-Personnel |
| Type | Buster |
| Hit-Count | 3 |
| Lvl | Damage + | Charge | Stun Chance | Burn Damage |
|---|---|---|---|---|
| 1 | 300% | 100% | 50% | 500 |
| 2 | 400% | 200% | 57.5% | 600 |
| 3 | 450% | 300% | 65% | 700 |
| 4 | 475% | 400% | 72.5% | 800 |
| 5 | 500% | 500% | 80% | 900 |
Skill Priority: 3 / 1 / 2

Available from the start
Increases own defense for 3 turns.
| Lvl | Defense + | Cooldown |
|---|---|---|
| 1 | 16% | 7 |
| 2 | 16.8% | 7 |
| 3 | 17.6% | 7 |
| 4 | 18.4% | 7 |
| 5 | 19.2% | 7 |
| 6 | 20% | 6 |
| 7 | 20.8% | 6 |
| 8 | 21.6% | 6 |
| 9 | 22.4% | 6 |
| 10 | 24% | 5 |

Unlocks after 1st Ascension
Reduces the defense of one enemy for 3 turns.
Increases their attack by 20% for 3 turns.
| Lvl | Defense - | Cooldown |
|---|---|---|
| 1 | 12% | 7 |
| 2 | 13.2% | 7 |
| 3 | 14.4% | 7 |
| 4 | 15.6% | 7 |
| 5 | 16.8% | 7 |
| 6 | 18% | 6 |
| 7 | 19.2% | 6 |
| 8 | 20.4% | 6 |
| 9 | 21.6% | 6 |
| 10 | 24% | 5 |

Unlocks after Strengthening Quest
Remove own Debuff.
Increases Buster performance for 1 turn.
| Lvl | Buster + | Cooldown |
|---|---|---|
| 1 | 20% | 7 |
| 2 | 21% | 7 |
| 3 | 22% | 7 |
| 4 | 23% | 7 |
| 5 | 24% | 7 |
| 6 | 25% | 6 |
| 7 | 26% | 6 |
| 8 | 27% | 6 |
| 9 | 28% | 6 |
| 10 | 30% | 5 |
 | Mad Enhancement EX Increases damage of unit's Buster cards by 12% |
|---|
 |  |  | | |
| Card |  Quick |  Arts |  Buster |  Extra |
|---|---|---|---|---|
| Hit-Count | 2 | 1 | 1 | 3 |
A QABBB deck is usually a Berserker’s best deck, and the same stands for Kiyohime. This deck lets her hit hard despite having low ATK stats, which boosts her value very well. Since her NP gain is extraordinary anyway, the deck doesn’t limit her as much as it does other Berserkers, making it the perfect deck to counter her innate weaknesses.
| 1st | 2nd | 3rd |
|---|---|---|
| 8 | 10 | 12 |
| 8 | 11 | 14 |
| 8 | 1 | 1 |
| 4 | 6 | 8 |
| B / Q | 9 | 12 |
| 0 | 0 | 0 |
| Lvl | Exp Required | Total Exp |
|---|---|---|
| 1 | 1,500 | 1,500 |
| 2 | 2,250 | 3,750 |
| 3 | 3,000 | 6,750 |
| 4 | 3,750 | 10,500 |
| 5 | 4,500 | 15,000 |
| 6 | 205,000 | 220,000 |
| 7 | 230,000 | 450,000 |
| 8 | 250,000 | 700,000 |
| 9 | 280,000 | 980,000 |
| 10 | 350,000 | 1,330,000 |
| Lvl | QP Cost | Materials |
|---|---|---|
| 1 → 2 | 50,000 |  x4 (Shining Gem of Madness) x4 (Shining Gem of Madness) |
| 2 → 3 | 100,000 | x8 (Shining Gem of Madness) |
| 3 → 4 | 300,000 |  x4 (Magic Gem of Madness) x4 (Magic Gem of Madness) |
| 4 → 5 | 400,000 | x8 (Magic Gem of Madness) x10 (Pumpkin Head) x10 (Pumpkin Head) |
| 5 → 6 | 1,000,000 |  x4 (Secret Gem of Madness)x20 (Pumpkin Head) x4 (Secret Gem of Madness)x20 (Pumpkin Head) |
| 6 → 7 | 1,250,000 | x8 (Secret Gem of Madness) x4 (Ghost Lantern) x4 (Ghost Lantern) |
| 7 → 8 | 2,500,000 |  x5 (Yggdrasil Seed)x7 (Ghost Lantern) x5 (Yggdrasil Seed)x7 (Ghost Lantern) |
| 8 → 9 | 3,000,000 | x15 (Yggdrasil Seed) x7 (Dragons Reverse Scale) x7 (Dragons Reverse Scale) |
| 9 → 10 | 5,000,000 |  x1 (Crystallized Lore) x1 (Crystallized Lore) |
| Ascension | QP Cost | Materials |
|---|---|---|
| 1st | 30,000 |  x4 (Berserker Piece) x4 (Berserker Piece) |
| 2nd | 100,000 | x8 (Berserker Piece)x5 (Ghost Lantern) |
| 3rd | 300,000 |  x4 (Berserker Monument)x20 (Pumpkin Head) x4 (Berserker Monument)x20 (Pumpkin Head) x8 (Dragon Fang) x8 (Dragon Fang) |
| 4th | 900,000 | x8 (Berserker Monument)x4 (Dragons Reverse Scale)x16 (Dragon Fang) |
| US/EN (UTC) | |
|---|---|
 Ibaraki Douji event: Rashoumon May 16 - 30 | - |
| JP (JST) | |
 Fate/Apocrypha Event: Inheritance of Glory Apr 29 - May 13 |  Murder at the Kogetsukan May 11 - 18 |
| Master Missions | |
|---|---|
| JP May 7 - 13 | US May 7 - 13 |
| Pickup Servants | ||
|---|---|---|
 Shuten Douji | ||
| Pickup CEs | ||
 Fox's Night Dream |  Burning Love Story |  Subscription List Reading |
| Pickup Servants | |
|---|---|
") Achilleus (Achilles) |  Chiron |
| Pickup Craft Essences | ||
|---|---|---|
 A Pilgrimage Towards Him |  The Moment of Destruction |  Let's Depart! |

")


")


")